If you’re a fan of houseplants, the jade plant (Crassula ovata) has probably caught your eye at some point. With its thick, fleshy leaves and sturdy stems, this succulent is not only visually striking but also incredibly resilient. The best part? You can easily multiply your jade plant collection—or share it with friends—by learning How to propagate Jade Plant. Whether you’re a seasoned gardener or just starting out, propagating a jade plant is a rewarding experience that doesn’t require much time or effort. In this guide, we’ll walk you through the various methods you can use to create new jade plants from your existing one. Ready to dive in and grow your green thumb? Let’s get started!
Table of Contents

Types of Propagation Methods
When it comes to propagating a jade plant, you’ve got a few options, and each one is as simple as the next. Whether you want to start with just a single leaf or go for a whole stem, jade plants are pretty forgiving. Let’s break down the three main ways you can propagate your jade plant: leaf propagation, stem cutting propagation, and offsets and division.
- Leaf Propagation:
If you’re feeling a little adventurous, you can propagate a new jade plant from just a single leaf. Yep, that’s right! All you need is one healthy leaf, and with a bit of patience, you’ll see roots forming. It’s a slower process compared to stem cutting, but watching that tiny leaf turn into a thriving plant is incredibly satisfying. - Stem Cutting Propagation:
This is probably the most popular method because it’s quick and almost foolproof. You simply snip off a section of the stem with a few leaves attached, let it dry out, and then plant it. Before you know it, you’ll have a new jade plant sprouting roots and growing strong. It’s perfect if you’re looking to create more plants in a short amount of time. - Offsets and Division:
If your jade plant is older and has some side shoots (known as offsets), you can divide them from the main plant. This method is great if you want to maintain the shape of your mother plant while getting a whole new one in the process. It’s like a buy-one-get-one-free deal, but with plants!
Each method has its own charm, so whether you’re propagating for fun, gifting, or just filling your home with more green, there’s a method that’ll work for you. Ready to choose your propagation path? Let’s keep going!

Supplies You’ll Need
Before you jump into propagating your jade plant, it’s a good idea to gather everything you’ll need. Don’t worry—propagating jade plants doesn’t require a ton of fancy equipment. In fact, you probably have most of these items at home already. Here’s a quick list of supplies to get you started:
- Sharp, Clean Scissors or Pruners:
You’ll need something sharp to make clean cuts on the leaves or stems. Make sure they’re sanitized to prevent any bacteria from causing problems later on. - Well-Draining Potting Mix:
Jade plants are succulents, so they prefer soil that doesn’t hold too much water. A cactus or succulent mix works perfectly, or you can mix regular potting soil with some perlite or sand for better drainage. - Small Pots or Containers:
You’ll want small pots to start your new jade plants in. It’s best to use something with drainage holes to prevent water from sitting at the bottom. If you’re propagating multiple cuttings, you can even use a seed tray to start them off. - Watering Can or Spray Bottle:
A light misting from a spray bottle is perfect for keeping the soil just slightly damp while your cuttings or leaves are rooting. Remember, jade plants don’t like too much water, especially when they’re starting out. - A Warm, Bright Spot:
Okay, this isn’t exactly a “supply,” but having a spot with plenty of indirect sunlight is key for successful propagation. Your new plants will need warmth and light to encourage root growth.
And that’s it! See? Nothing too complicated. Once you’ve got everything ready, you’ll be set to start propagating your jade plant like a pro. Let’s move on to the fun part—the step-by-step guide for each propagation method!
How to Propagate Jade Plant by Leaf
Ready to try your hand at leaf propagation? It’s an easy and rewarding way to grow a new jade plant from just a single leaf. It may take some time, but watching that little leaf transform into a whole new plant is totally worth it. Let’s know it step by step.
- Select a Healthy Leaf:
Start by choosing a plump, healthy leaf from your jade plant. It’s best to pick one from the lower part of the plant that’s fully mature. Gently twist or cut the leaf off right at the base where it connects to the stem. Make sure you get a clean break—any damage to the leaf can make it harder to root. - Let the Leaf Callous:
Here’s where patience comes in. After you’ve removed the leaf, place it in a dry spot out of direct sunlight and let it sit for a few days. This step is crucial because it allows the cut end to callous over, which helps prevent rot when you plant it. You’ll know it’s ready when the cut end feels dry and slightly hardened. - Plant the Leaf in Soil:
Once your leaf has calloused, it’s time to plant it. Fill a small pot with your well-draining succulent soil and place the leaf on top of the soil with the cut end facing down. You don’t need to bury the leaf; just rest it on the soil surface. If you’re propagating multiple leaves, you can place them all in the same pot, spaced out a bit. - Watering and Care:
Here’s where you need to be gentle. Instead of watering the soil like you would with an established plant, use a spray bottle to lightly mist the soil every few days. You want the soil to be just barely damp—too much water can cause the leaf to rot before it has a chance to root. Place the pot in a warm spot with indirect sunlight, and then it’s just a matter of waiting. - Watch for Roots and Growth:
After a few weeks, you’ll start to notice tiny roots forming at the base of the leaf. Eventually, you might even see a small new plant beginning to grow! Keep caring for it with occasional misting until the new plant is big enough to handle regular watering. Once it’s established, you can treat it just like your other jade plants.
And that’s it! Leaf propagation is a slow but steady process, so don’t worry if it takes a little while to see progress. Before you know it, you’ll have a brand-new jade plant that you grew all on your own. Ready to try stem cutting propagation next? Let’s dive in!
How to Propagate Jade Plant by Stem
If you’re looking for a quicker way to grow a new jade plant, stem cutting propagation is the way to go. It’s a straightforward method that gives you a new plant faster than leaf propagation. Plus, it’s a great option if your jade plant is getting a little too tall or leggy. Let us take a step-by-step look at the procedure.
Choose the Right Stem:
Start by picking a healthy stem that’s about 3-4 inches long. Ideally, it should have a few leaves on it. Look for a stem that’s firm and vibrant, avoiding any that look soft, wrinkled, or damaged. A good rule of thumb is to go for a stem with a bit of thickness to it—this means it has plenty of stored energy to produce roots.
- Make the Cut:
Grab your clean, sharp scissors or pruners, and snip the stem just below a leaf node (the spot where a leaf meets the stem). If there are leaves near the base of your cutting, gently remove them so that you have a few inches of bare stem to plant. Now, just like with leaf propagation, you’ll need to let the cutting dry out for a few days. Place it in a dry, shaded spot and let the cut end callous over. - Planting the Stem Cutting:
Planting your cutting should occur when the cut end has become callused. Make a little hole in the middle of a small pot filled with soil that drains properly. To keep the stem upright, place the cut end into the hole and gently press dirt around it. Just enough must be buried to sustain the cutting, not too much. - Watering and Care:
After planting, lightly water the soil so that it’s just slightly damp, then place the pot in a bright spot with indirect sunlight. Jade plants don’t like sitting in water, so be careful not to overwater. Let the soil dry out between waterings, giving your cutting a light drink only when the top inch of soil feels dry.
- Rooting and Growth:
It is now time to engage in some waiting games. Your cutting should take on roots in a few of weeks. To verify, you can gently tug on it; if it resists, roots are beginning to grow. Subsequently, you’ll notice new leaves emerging at the top, an excellent indication that your jade plant is almost ready to become a houseplant.
Stem cutting propagation is not only quick but also super satisfying. With just a little bit of care, you’ll have a brand-new jade plant ready to thrive. And if you’re up for it, you can try propagating even more cuttings! Ready to explore another method? Let’s talk about propagating through offsets and division next.
How to Propagate Jade Plant Through Offsets and Division
If your jade plant has been around for a while, you might notice some little “mini-me” plants growing around its base. These are called offsets, and they’re basically free bonus plants just waiting to be propagated! Dividing and replanting these offsets is one of the easiest ways to get more jade plants without much effort. Let’s know this step by step.
- Identify the Offsets:
First things first, take a close look at the base of your jade plant. You’ll often find small, fully-formed plants growing next to the main stem. These are the offsets we’re after. They usually have their own roots, which makes them perfect candidates for propagation. If you don’t see any yet, don’t worry—sometimes it takes a mature plant a little while to produce them. - Gently Remove the Offset:
When you’re ready to propagate, carefully remove the jade plant from its pot so you can get a better look at the offsets and their roots. Use your fingers or a small tool to gently separate the offset from the main plant. The key here is to be gentle—try to keep the roots intact as much as possible. If the offset doesn’t have many roots, don’t worry; it will grow more once planted. - Prepare the New Pot:
Once you’ve separated the offset, grab a small pot with well-draining soil, just like you would for any succulent. Make a small hole in the soil, and plant the offset, making sure its roots are well-covered. Firm the soil around the base to keep it stable, and give it a little bit of water to help it settle in. - Caring for the New Plant:
Place your newly potted offset in a bright spot with indirect sunlight, just like the mother plant. Since it’s still getting established, you’ll want to water it lightly until it starts showing new growth. Be careful not to overwater—jade plants prefer to dry out between drinks. Within a few weeks, you should start to see signs of new growth, which means your offset is happily rooting in its new home. - Maintaining the Mother Plant:
After you’ve removed the offset, go ahead and repot the mother plant as well, giving it fresh soil if needed. This is also a great time to check if your main plant needs a bigger pot to accommodate its growth. Removing offsets not only gives you new plants but also helps the mother plant stay healthy and not too crowded.
And that’s it! Propagating through offsets and division is like getting a two-for-one deal—both the mother plant and the new offset get a fresh start. It’s a quick and easy way to expand your jade plant collection with minimal effort. Now that you’ve got this down, you’re well on your way to becoming a jade plant propagation pro! Ready to learn how to care for your new plants? Let’s talk about the ideal growing conditions next.
Caring for Your Newly Propagated Jade Plant
Now that you’ve successfully propagated your jade plant—whether by leaf, stem cutting, or offset—it’s time to make sure your new plants thrive. Jade plants are pretty low-maintenance, but giving them the right care from the start will help them grow strong and healthy. Here’s everything you need to know to keep your new jade plants happy.
- Light Requirements:
Jade plants love sunlight, but they prefer it to be indirect, especially when they’re young. Place your new plants near a bright window where they can soak up plenty of light without getting scorched. If you notice the leaves turning red, it might be a sign they’re getting too much direct sun. On the other hand, if they start to look a bit leggy, they might need a bit more light. - Watering:
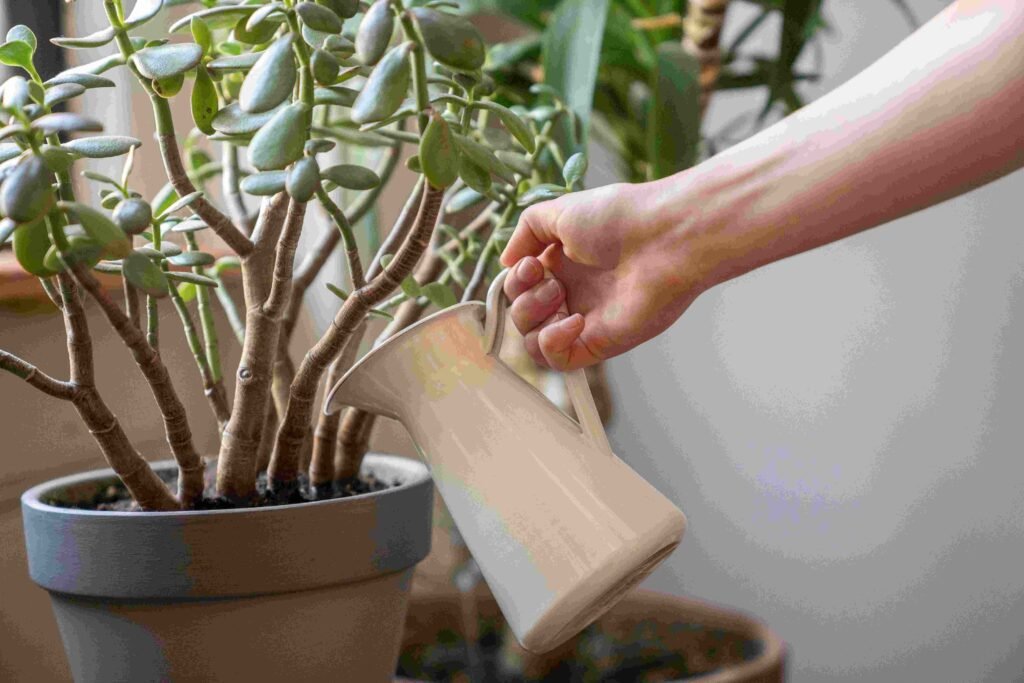
When it comes to watering, jade plants are the definition of “less is more.” They store water in their thick leaves, so they don’t need frequent watering. Wait until the top inch of soil is completely dry before giving them a drink. During the winter months, when growth slows down, you can cut back on watering even more. Overwatering is the most common mistake people make with jade plants, so if you’re ever in doubt, it’s better to wait a few more days before watering again. - Soil and Potting:
Jade plants need well-draining soil to prevent root rot. If you’re using regular potting soil, be sure to mix in some perlite or sand to improve drainage. As for the pot, make sure it has drainage holes to let excess water escape. Terracotta pots are a great choice because they help wick moisture away from the roots, keeping the soil from staying too wet. - Temperature and Humidity:
Jade plants aren’t too fussy about temperature, but they do best in a range of 65-75°F (18-24°C). They can tolerate cooler temperatures at night, but try to avoid letting them drop below 50°F (10°C). Jade plants also prefer low humidity, which makes them perfect for most indoor environments. - Feeding Your Jade Plant:
To give your new jade plants a boost, you can feed them with a balanced, water-soluble fertilizer during the growing season (spring and summer). Just be sure to dilute the fertilizer to half strength to avoid burning the roots. In the fall and winter, you can skip the feeding altogether as the plant’s growth slows down.
By following these simple care tips, your newly propagated jade plants will be well on their way to becoming robust, mature houseplants. Before you know it, you might find yourself with a whole collection of jade plants, all grown from your own propagating efforts
Common Problems and How to Fix Them
Even though jade plants are generally easygoing, they can sometimes run into a few issues—especially when they’re newly propagated. The good news is that most problems are easy to spot and even easier to fix with a little bit of know-how. Let’s go over some common problems you might encounter and how to tackle them.
- Yellowing Leaves:
If you notice the leaves on your jade plant turning yellow, it’s usually a sign of overwatering. Remember, jade plants prefer to be on the dry side, so cut back on watering and let the soil dry out completely before your next watering. If the yellowing is severe, you might need to check the roots for rot. In that case, repotting in fresh, dry soil can help save your plant. - Leaf Drop:
Dropping leaves can be a sign of a few things. It might be due to sudden changes in temperature, like a draft from a nearby window, or even under-watering. If the soil is bone dry, give your jade plant a good soak and then let it dry out completely before the next watering. Also, make sure your plant isn’t exposed to any cold drafts—jade plants like to stay cozy. - Wrinkled or Shriveling Leaves:
Wrinkled or shriveled leaves usually mean your jade plant is thirsty. Even though they don’t need a lot of water, jade plants will let you know when they’re too dry by their leaves looking a bit deflated. Give your plant a thorough watering, and it should perk up within a day or two. Just be careful not to go overboard; consistency is key. - Stunted Growth:
If your jade plant isn’t growing as quickly as you’d like, it could be due to a lack of light. Make sure your plant is getting plenty of indirect sunlight throughout the day. If it’s in a spot that’s too shady, try moving it closer to a bright window. Another possibility is that your plant is root-bound, which happens when the roots outgrow the pot. If that’s the case, consider repotting it into a slightly larger pot to give the roots room to spread out. - Root Rot:
Root rot is probably the trickiest issue to deal with, but it’s also the most preventable. It happens when a jade plant sits in soggy soil for too long. If you suspect root rot (like if the soil smells sour or the plant is wilting despite being watered), take the plant out of its pot and inspect the roots. Trim away any mushy, blackened roots, then repot the plant in fresh, dry soil. Be sure to cut back on watering until the plant recovers.
With a little attention and care, most problems with your jade plant can be easily resolved. And the best part? Once you get the hang of it, your jade plant will reward you with years of lush, beautiful growth. So don’t stress if something goes wrong—just make a few adjustments, and your plant will bounce back in no time. Now that you’re equipped with all this knowledge, you’re ready to enjoy the many rewards of propagating and caring for your jade plants!
You can also read more post on “Jade Plant”


